
|
|
 |
|
|
|
Welcome to the Australian Ford Forums forum. You are currently viewing our boards as a guest which gives you limited access to view most discussions and inserts advertising. By joining our free community you will have access to post topics, communicate privately with other members, respond to polls, upload content and access many other special features without post based advertising banners. Registration is simple and absolutely free so please, join our community today! If you have any problems with the registration process or your account login, please contact us. Please Note: All new registrations go through a manual approval queue to keep spammers out. This is checked twice each day so there will be a delay before your registration is activated. |
|
|||||||
 |
|
|
Thread Tools | Display Modes |
|
|
#1 | ||
|
Next upgraded Mk1 Leopard
 Join Date: Jan 2005
Location: Sydney, in the burbs
Posts: 4,915
|
This is a short how to on changing the front drivers seat. As a 'big' guy (or fat to most) the drivers seat was showing its age. The outside back swab foam had worn
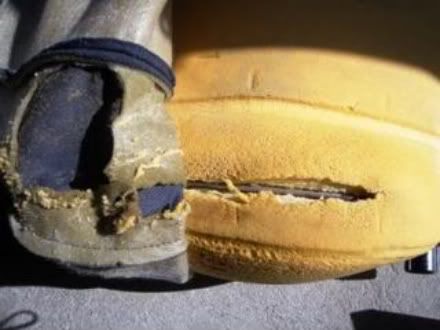 and the base had lost the support feel. So I went to the wreckers and bought the back section (drivers side in better nic than mine). This was cheaper than buying the whole seat. So first remove the front seats (both) Slide the seat forward and backward to again access to the retaining bolts 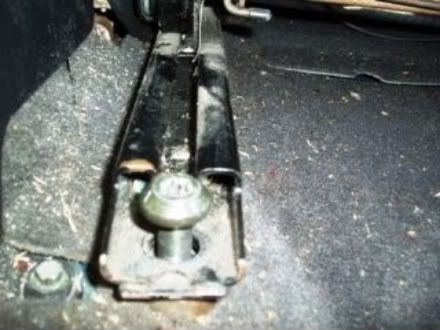 and 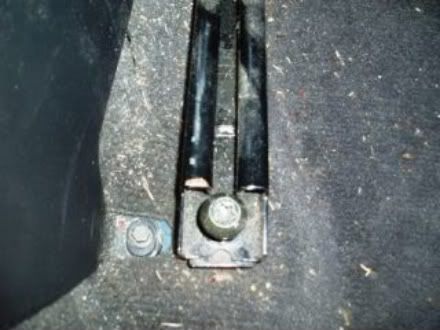 Unplug the cable at the base of each seat. 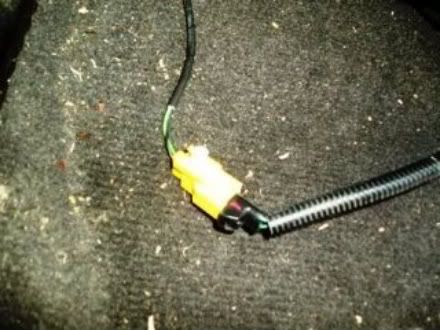 with both seats out give the floor a quick vacuum 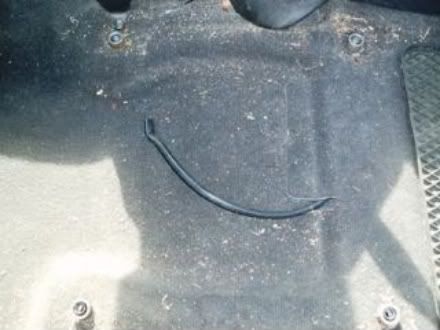 Next with the seats out, remove the passenger and driver seat bases. they are held on by 4 bolts under each base 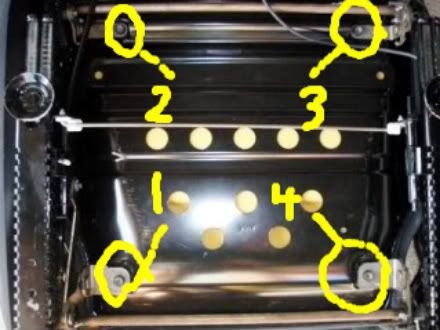 The bases just swap straight over. As I hardly ever have a passenger going to and from work the passenger side feels like new. Next the back section. Undo the drivers side back rest from the base. Firstly remove the lumber support knob. 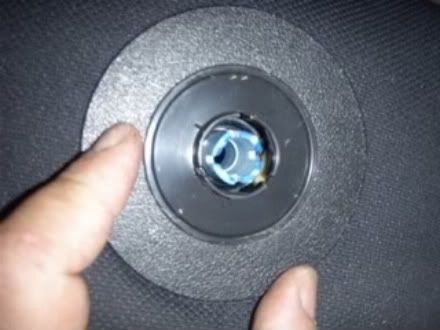 next on each side the bolts at the base of the back support (2 on one side, 3 on the other) 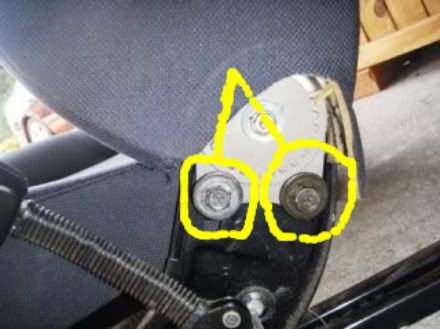 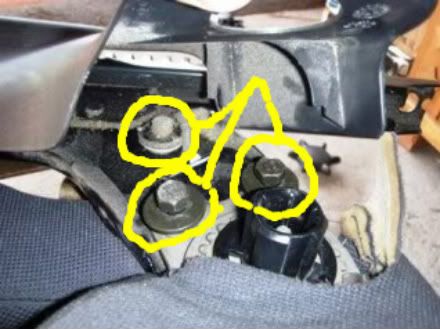 Next swap over the cover and inside foam from the donor back section. You will need a pair of wire cutters to remove the retaining clips on the bottom of the back section As you peel back the seat cover the damage on the driver seat is quite clear.  3/4s of the way up there is a steal rod that holds in the seat cover, again using the wire cutters cut the ties. Repeat the process to the donor back section. This show the condition of the 'brand new second hand' foam. 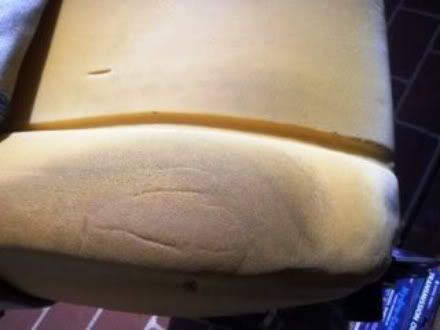 Next I repaired the donor cover, I used some tape and glue just to firm it up. 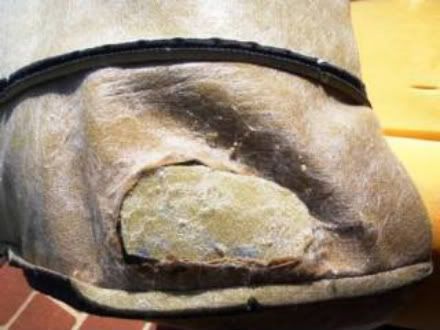 The foam is easy to swap over. Having swapped the foam pull the 'new' cover the foam. I used plastic pull ties to replace the metal ones Ford uses. Re clip the steal rod (sorry no pics). Pulling the seat cover tight, retie the bottom section. 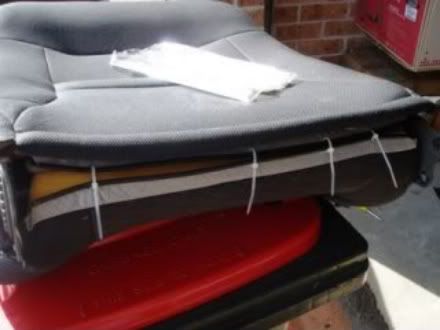 Next bolt the back section back to the base and attach the lumbar support knob  That is it. You put the seats back in. My drivers side base feels a lot firmer and the side is great.  and with seat covers on and with seat covers on 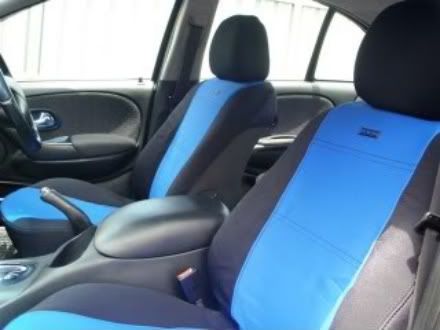 Next I might as well use the spare donor steal frame for the passanger side as it has lumber support. UK
__________________
Plastic Surgery 1 AUII Monsoon Blue How 2's: Change rear view mirror, Install backfire valve, Change foam front seats, Install auto transmission cooler, Replace Trans Shift Globe, Remove front door Trim, Paint AU headlights, install door spears, Premium Rear Parcel Shelf, go here...
 |
||
|
|

|
| This user likes this post: |
|
|
#2 | ||
|
Flairs - Truckers Delight
Join Date: Aug 2006
Location: Brisbane Northside Likes: Opposite Lock
Posts: 5,731
|
Awesome writeup UK - can you blow up the photos a bit though pls?
__________________
Current: Silhouette Black 2007 SY Ford Territory TX RWD 7-seater "Black Banger"
2006-2016: Regency Red 2000 AUII Ford Falcon Forte Automatic Sedan Tickford LPG "Millennium Falcon" |
||
|
|

|
|
|
#3 | ||
|
Next upgraded Mk1 Leopard
 Join Date: Jan 2005
Location: Sydney, in the burbs
Posts: 4,915
|
Done

__________________
Plastic Surgery 1 AUII Monsoon Blue How 2's: Change rear view mirror, Install backfire valve, Change foam front seats, Install auto transmission cooler, Replace Trans Shift Globe, Remove front door Trim, Paint AU headlights, install door spears, Premium Rear Parcel Shelf, go here...
 |
||
|
|

|
|
|
#4 | ||
|
Walking with God
Join Date: Mar 2005
Location: Melbourne
Posts: 7,321
|
Nice work UK!
GK
__________________
2009 Mondeo Zetec TDCi - Moondust Silver 2015 Kia Sorento Platinum - Snow White Pearl 2001 Ducati Monster 900Sie - Red Now gone! 1999 AU1 Futura Wagon - Sparkling Burgundy On LPG Want a Full Life? John 10:10 |
||
|
|

|
|
|
#5 | ||
|
Next upgraded Mk1 Leopard
 Join Date: Jan 2005
Location: Sydney, in the burbs
Posts: 4,915
|
Thanks GK, Praise indeed
   UK  
__________________
Plastic Surgery 1 AUII Monsoon Blue How 2's: Change rear view mirror, Install backfire valve, Change foam front seats, Install auto transmission cooler, Replace Trans Shift Globe, Remove front door Trim, Paint AU headlights, install door spears, Premium Rear Parcel Shelf, go here...
 |
||
|
|

|
|
|
#6 | |||
|
AU DIE HARD
  Join Date: Nov 2005
Location: Between 2nd and 5th gear
Posts: 5,073
|
Another nice job there UK , another for the how to threads
 , just one more tip, this is what Ford did when my baluster failed after 12 months was to wrap the bars running up the side with a layer of tape to stop it rubbing on it, , just one more tip, this is what Ford did when my baluster failed after 12 months was to wrap the bars running up the side with a layer of tape to stop it rubbing on it,must have worked , 8 years on and still going 
__________________
........Age and treachery will ALWAYS overcome youth and skill....... CORTINA 250 2V POWER soon to be AUXR8 Windsor pwrd .............WINDSOR WARLORD WHO CARRIES THE CLEVO MAFIA AND BROKEN BOSSES... .........................  ......................... .........................Quote:
|
|||
|
|

|
| This user likes this post: |
|
|
#7 | ||
|
Starter Motor
Join Date: Aug 2020
Location: Warwick, QLD
Posts: 12
|
I have an XL ute that has pretty sad seats. I was looking to either refurbish what is there or, reaplace wth something aftermarket (Saas or something)
The foam that is used to refurbsh, none of that seems to suit the non-XR6/8 family... Is there a HUGE difference in the seats themselves that would cause the form from one, not to work with the fabric cover of mine?
__________________
The Gene Pool Needs More Chlorine. |
||
|
|

|
|
|
#8 | ||
|
DIY Tragic
Join Date: Apr 2018
Location: Sydney, more than not. I hate it.
Posts: 22,653
|
Excluding possibly FPV products, the framing of base and backrest is consistent - noting variants that may include lumbar support and side airbags.
Foam has Velcro style ďhook stripsĒ bonded to its channels. So the pattern of the foam must match the pattern of the cover stitching. You can glue in repair chunks with contact adhesive or sometimes polyurethane glue (this can give a hard seam). Foam is best cut in a domestic repair with razor sharp shears IMO. |
||
|
|

|
| 2 users like this post: |
|
|
#9 | ||
|
Starter Motor
Join Date: Aug 2020
Location: Warwick, QLD
Posts: 12
|
CitroŽnbender
Thanks heaps for the info. That is great news actually.I would probably not go the "repair chunks" idea  I can see how that mighht go down the track... I can see how that mighht go down the track...  If I did not get the standard see re-foamed, I would likely look into a sports seat from Saas or Sparco or something like that, similar to what others have done. Cheers again.
__________________
The Gene Pool Needs More Chlorine. |
||
|
|

|
|
|
#10 | ||
|
FF.Com.Au Hardcore
Join Date: Mar 2005
Posts: 1,228
|
My recollection is that AU seat trim is hog ringed to inset wire in the foam and not attached with the velcro strip.
__________________
AUII XR6 VCT ute 20 years and still going strong! |
||
|
|

|
|
|
#11 | |||
|
Starter Motor
Join Date: Aug 2020
Location: Warwick, QLD
Posts: 12
|
Quote:
 I watched a "how-to" video and it seems fairly straight forward, albeit tedious. Cheere for the replies 
__________________
The Gene Pool Needs More Chlorine. |
|||
|
|

|
 |
| Thread Tools | |
| Display Modes | |
|
|